
Toe kick lighting is one of the most effective upgrades for modern kitchens, bathrooms, or cabinetry. Subtle yet impactful, these low-profile LED strips installed at the base of cabinets or furniture create a floating visual effect while providing practical illumination. Many homeowners attempt to install toe kick lighting but struggle with uneven brightness, flickering, or choosing the wrong LED type.
This guide walks you through everything you need to know, from understanding toe kick lighting and selecting the right LEDs to planning, installation, and maintenance tips, ensuring professional results even for DIY projects.
What is Toe Kick Lighting?
Toe kick lighting refers to LED illumination installed along the recessed base of cabinets, vanities, or furniture. This recessed area, known as the “toe kick,” is typically a few inches tall and creates a natural place for subtle lighting. Toe kick LEDs give the impression that cabinets are floating above the floor, which enhances visual appeal and modern design.
In kitchens, this type of lighting highlights the cabinetry and floors, creating a welcoming and stylish environment. In bathrooms or hallways, it serves a functional purpose by illuminating pathways, allowing safe movement at night without relying on overhead lighting.
Benefits of Toe Kick Lighting
Beyond aesthetics, toe kick lighting provides several practical benefits. First, it enhances safety. By illuminating the floor, it reduces the risk of tripping or bumping into cabinets in low-light conditions. This is especially useful in homes with children, elderly residents, or pets. Second, it contributes to layered lighting.
Integrating toe kick lighting with ambient, task, and accent lighting creates a balanced environment suitable for cooking, cleaning, and entertaining. Third, LED toe kick lighting is energy-efficient. Low-voltage LEDs consume minimal electricity, making them ideal for extended or nighttime use. Additionally, dimmable options allow homeowners to adjust brightness to match the activity or mood, from bright prep lighting to soft evening ambiance.
Choosing the Right LED for Toe Kick Lighting
LED Strip Types
Selecting the correct LED strip is crucial for both performance and appearance. Flexible LED strips are the most popular option because they can be cut to length, bent around corners, and installed easily under cabinets or along furniture bases. For longer, straight runs, rigid strips provide a clean, consistent line of light.
Homeowners can also choose between single-color LEDs or RGB/tunable white strips. Single-color strips offer simplicity and reliability, while RGB or tunable LEDs allow for adjusting color and brightness to create various moods. In areas exposed to moisture, such as bathrooms, waterproof or water-resistant LED strips are necessary to ensure longevity and safety.
Brightness and Color Temperature
Proper brightness and color temperature are essential for creating the desired effect. Toe kick lighting is meant to be subtle, so excessive brightness can overwhelm the space. A typical recommendation is 100–150 lumens per foot for a gentle glow, while 200 lumens or more per foot creates a stronger effect. Color temperature also plays a major role in ambiance.
Warm white (2700K–3000K) creates a cozy, inviting atmosphere, while neutral white (3500K–4100K) provides clarity and visibility. Cool white tones should be used sparingly because they can feel stark and uninviting in decorative installations. Choosing the right combination of lumens and Kelvin ensures both functional lighting and aesthetic appeal.
Quality and Lifespan
Not all LED strips are created equal. Low-quality LEDs may flicker, fade unevenly, or fail prematurely. High-quality strips rated for 15,000–25,000 hours deliver consistent brightness and color. Dimmable, flicker-free LEDs provide flexibility for adjusting ambiance while maintaining long-term reliability.
Reputable brands often offer warranties, guaranteeing performance and reducing the risk of early failure. Investing in quality LEDs also ensures consistent color rendering, which is particularly important in kitchens where accurate lighting affects food appearance and cooking precision.
Planning and Preparing for Installation
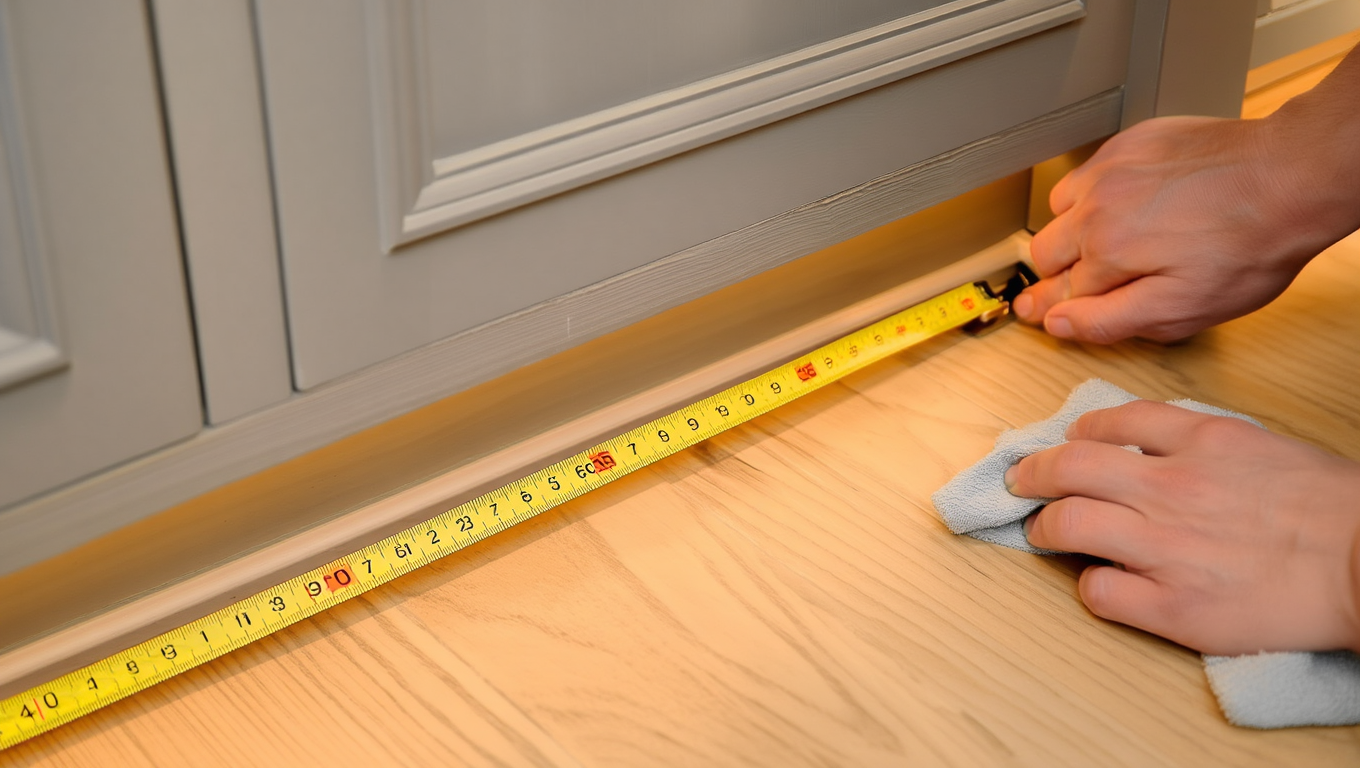
Measuring and Layout Planning
Accurate measurement and planning are essential before installing toe kick lighting. Begin by measuring the total length of the area where the lighting will be installed, including straight runs and corners. Identify where the power supply will be located and plan for wiring paths. Proper layout ensures a clean, professional appearance and avoids gaps or uneven illumination.
For longer installations, consider parallel wiring to prevent voltage drop, which can dim LEDs at the far end of the run. Proper planning also includes ensuring that LED strips can be replaced or repaired in the future without dismantling cabinets.
Surface Preparation
Preparing the surface is key to achieving a clean and long-lasting installation. The mounting area should be cleaned thoroughly to remove dust, grease, or debris. A dry, smooth surface ensures that adhesive-backed strips or mounting channels adhere properly.
Many homeowners use mounting channels not only for secure installation but also to diffuse the light evenly, eliminating harsh hotspots. Channels help achieve a soft, professional glow while protecting the LED strips from damage and wear.
Power Supply and Wiring
Selecting the correct power supply is critical for performance and safety. Most toe kick LED strips operate on low voltage, typically 12V or 24V DC. Using an appropriate LED driver or transformer converts household AC power safely. Wiring should be secured to prevent loose connections, and circuits should not be overloaded.
For installations spanning multiple cabinets or corners, careful planning of wiring runs prevents flickering and ensures even brightness. Safety considerations are crucial, particularly in areas near moisture, such as bathrooms or kitchens, where waterproofing and proper insulation are necessary.
Mounting and Installation Tips
Mounting LED Strips
Once the layout is planned and surfaces prepared, mounting the LED strips can begin. Peel-and-stick adhesive-backed strips are simple to apply, but channels or rails provide a more professional finish and help diffuse light. Ensure the strips are aligned straight and evenly spaced for uniform illumination.
Corners should be cut at designated points to avoid damaging the strips. Wires should be hidden along the back edges or inside cabinets to maintain a clean look. Proper mounting ensures that the toe kick lighting looks seamless and contributes to the floating effect of the cabinetry.
Testing and Adjusting
Before permanently securing the strips, turn on the lighting to check for brightness, alignment, and color consistency. Adjust placement as needed to eliminate gaps, shadows, or uneven illumination. Testing at night or in low-light conditions can provide a better sense of the effect.
Once the position and brightness are satisfactory, secure the strips or channels fully. Testing early in the installation prevents costly adjustments later and ensures a professional, high-quality result.
Advanced Installation Tips
Using Diffusers and Channels
One of the most effective ways to enhance toe kick lighting is by using diffusers or mounting channels. Diffusers soften the light emitted from LED strips, eliminating hotspots or uneven patches. This creates a smooth, continuous glow that enhances the floating cabinet effect. Channels not only secure the strips but also protect them from dust, cleaning, or accidental bumps.
In corners or tight spaces, L-shaped channels or flexible rails help maintain consistent illumination, preventing shadows or dark gaps. Homeowners often underestimate the visual impact of diffused light, but it is essential for achieving a professional, polished look.
Layered Lighting Considerations
Toe kick lighting should never exist in isolation. Combining it with ambient ceiling lights, under-cabinet task lighting, or accent lights provides a balanced lighting design. For kitchens, for example, recessed ceiling lights provide general illumination, under-cabinet LEDs illuminate countertops for meal prep, and toe kick lighting adds depth and safety.
Layering ensures that no area is under- or over-lit, improves functionality, and enhances the aesthetic appeal. A well-designed layered lighting setup also allows different areas to be adjusted independently, creating zones for cooking, dining, or relaxing.
Smart Controls and Dimming
Modern LED strips are compatible with dimmers, timers, and smart home systems. Installing dimmable drivers or smart LED controllers allows homeowners to adjust brightness according to time of day or activity. For instance, during cooking, brighter neutral lighting is ideal, while in the evening, a dim warm glow creates ambiance.
Some systems allow remote control via apps or voice commands, making it easy to change colors or adjust brightness without physically touching the switches. Smart controls also improve energy efficiency by reducing unnecessary lighting.
Troubleshooting Common Issues
Even with careful planning, problems can arise during or after installation. Understanding common issues ensures long-term performance and saves time.
Flickering or Uneven Light
Flickering is often caused by incompatible dimmers, insufficient power supply, or voltage drops across long LED runs. To fix this, verify the voltage requirements of the LED strips and ensure that the power supply can handle the total wattage.
Using high-quality, flicker-free LEDs and compatible dimmers solves most issues. For longer installations, wiring parallel connections instead of series runs can prevent voltage drop and maintain even brightness along the entire strip.
Gaps or Dark Spots
Dark spots occur when LED strips are cut incorrectly or mounted with inconsistent spacing. Repositioning strips, using continuous channels, or adding additional segments can eliminate uneven illumination.
Checking placement before final adhesion helps avoid this problem. Testing the light at night or in low-light conditions ensures that the effect is uniform and visually pleasing.
Wiring Problems
Loose or exposed wires can cause intermittent lighting or complete failure. Securing wires inside channels or along back edges ensures stability. For bathrooms or kitchens, waterproof connectors or insulated wiring protect against moisture-related failures. Planning wiring paths in advance and leaving access points for maintenance prevents future issues.
Maintenance and Longevity
Cleaning and Care
Toe kick LEDs require minimal maintenance but do benefit from occasional cleaning. Dust or grease can accumulate along the strips or channels, reducing brightness. Use a soft, dry cloth or lightly damp cloth with mild detergent to clean the area. Avoid harsh chemicals or abrasive materials that could damage the diffuser or adhesive backing. Regular inspection ensures all strips remain firmly mounted and functioning properly.
Replacing LED Strips
Even high-quality LEDs eventually reach the end of their lifespan, typically between 15,000 and 25,000 hours. When replacement is necessary, using removable adhesive or channels simplifies the process.
It’s important to replace strips with the same voltage, color temperature, and lumens to maintain consistency across the installation. Keeping extra strips on hand is advisable for large runs, as matching batches ensures uniformity in color and brightness.
Conclusion
Toe kick lighting is an elegant and practical upgrade that enhances the look, safety, and functionality of kitchens, bathrooms, or furniture. Successful installation depends on careful planning, selecting the right LED strips, and proper mounting and wiring techniques. Using diffusers, channels, and smart controls enhances both aesthetics and functionality, while troubleshooting knowledge ensures long-term performance. Layered lighting and consistent color temperature create cohesive, visually appealing spaces.
By following these tips and techniques, homeowners can achieve professional-quality toe kick lighting that elevates their home’s style. Explore our curated selection of LED strips, diffusers, and controllers to add the perfect toe kick lighting and transform your space today.
FAQs
Q1: Can I install toe kick lighting on my own?
A: Yes, toe kick lighting is DIY-friendly, but careful measurement, surface prep, and wiring knowledge are essential. Following proper installation steps ensures even lighting, safety, and a professional look. For complex layouts, consulting an electrician is recommended.
Q2: What color temperature is best for toe kick lighting?
A: Warm white (2700K–3000K) creates a cozy ambiance, while neutral white (3500K–4100K) improves visibility. Cooler tones may feel harsh. Choose based on the room’s purpose and existing lighting.
Q3: How do I hide wires for a clean finish?
A: Run wires along the cabinet’s back edge, inside channels, or behind trim panels. Concealing wires ensures a seamless, professional appearance and protects connections from damage.
Q4: Can toe kick lighting be used outdoors?
A: Yes, if using waterproof LED strips rated for outdoor use. Ensure connectors are sealed, and voltage is suitable for exterior applications to prevent water damage and safety hazards.
Q5: How long do LED strips last under cabinets?
A: High-quality LED strips last 15,000–25,000 hours. Lifespan depends on heat management, quality of components, and adherence to correct voltage specifications. Regular maintenance extends longevity.